

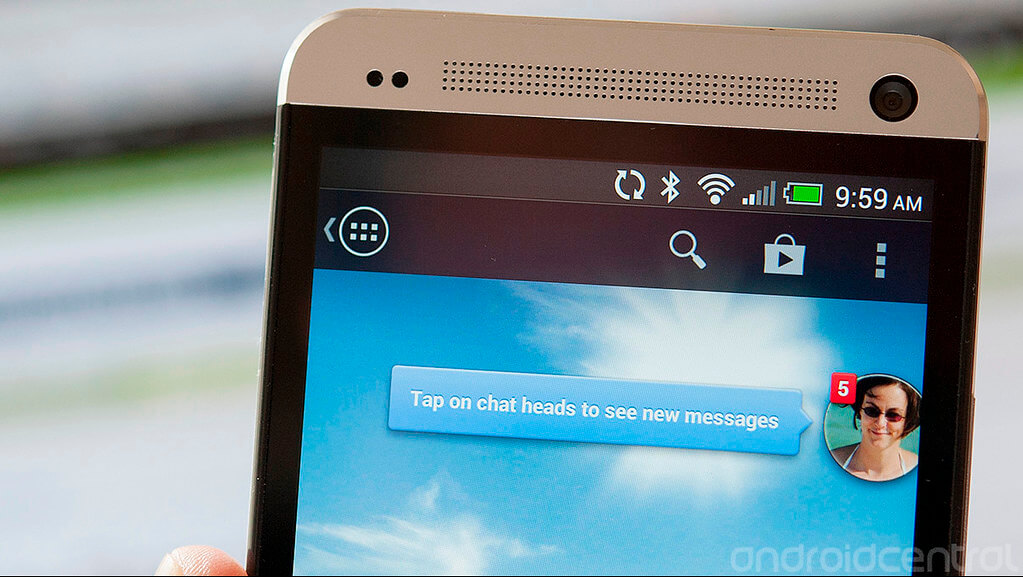
Mini chat trên Zalo là tính năng cho phép người dùng vừa làm việc vừa chat với bạn bè. Tính năng này có vẻ như lấy ý tưởng từ chat head của Facebook Messenger thì phải!?
Mình rất thích tính năng vì khả năng đa nhiệm của nó. Ví dụ, bạn đang đọc email thì nhận được tin nhắn từ Zalo, bạn có thể trả lời tin nhắn ngay mà không phải tắt emal app và mở zalo app lên.
Bài viết này sẽ hướng dẫn chi tiết cách tạo một chat head bubble đơn giản, cho phép người dùng có thể di chuyển vị trí của nó khắp màn hình.
Nội dung chính của bài viết
1. Kiến thức cơ bản
Chat head là một cửa sổ nổi đè lên giao diện của các app khác. Hệ thống Android cho phép một app đè lên một app khác nếu có permission: android.permission.SYSTEM_ALERT_WINDOW.
Chúng ta dùng background service để đè một widget lên trên RootView của ứng dụng đang mở. Do đó, nó luôn hiện lên trên các app khác.
Để có thể kéo khắp màn hình, chúng ta cần override OnTouchListener() để chat head tương tác với hành động của người dùng và thay đổi vị trí trên màn hình.
❤ Nếu chưa biết về runtime permission, mời bạn đọc bài viết này: Bàn luận về Runtime permission trong Android
2. Tiến hành viết code tạo chat head bubble
Tất nhiên, bạn cần tạo mới một project bằng Android Studio. Bài này, mình sẽ không hướng dẫn cách project mới nữa, bạn có thể đọc lại ở đây: Tạo project mới bằng Android Studio
Sau khi có project mới rồi, chúng ta tiền hành code thôi.
Bước 1: Thêm Permision
Thêm permission: android.permission.SYSTEM_ALERT_WINDOW vào file AndroidManifest.xml. Permission này cho phép app tạo cửa sổ đè lên các app khác.
<uses-permission android:name="android.permission.SYSTEM_ALERT_WINDOW"/>
Bước 2: Tạo layout
Chúng ta tạo một file xml cho layout, đặt tên là layout_chat_head.xml
<?xml version="1.0" encoding="utf-8"?>
<RelativeLayout
    xmlns:android="http://schemas.android.com/apk/res/android"
    xmlns:tools="http://schemas.android.com/tools"
    android:layout_width="65dp"
    android:id="@+id/chat_head_root"
    android:layout_height="wrap_content"
    android:orientation="vertical">

    <!--Profile image for the chat head.-->
    <ImageView
        android:id="@+id/chat_head_profile_iv"
        android:layout_width="60dp"
        android:layout_height="60dp"
        android:layout_marginTop="8dp"
        android:src="@drawable/ic_android_circle"
        tools:ignore="ContentDescription"/>

    <!--Close button-->
    <ImageView
        android:id="@+id/close_btn"
        android:layout_width="26dp"
        android:layout_height="26dp"
        android:layout_marginLeft="40dp"
        android:src="@drawable/ic_close"
        tools:ignore="ContentDescription"/>
</RelativeLayout>
💦 Bạn có thể đọc kỹ hơn về cách xây dựng layout: Layout trong Android và cách thiết kế layout hỗ trợ đa màn hình
Bước 3: Thêm View vào WindowManager và xử lý drag.
Tạo một service: ChatHeadService.java. Khi nào bạn muốn hiển thị thì khởi động service này bằng hàm startService().
Trong phần onCreate() của service, chúng ta sẽ thêm layout vào góc trái phía trên của cửa sổ.
public class ChatHeadService extends Service {
   private WindowManager mWindowManager;
   private View mChatHeadView;


   public ChatHeadService() {
   }


   @Override
   public IBinder onBind(Intent intent) {
       return null;
   }


   @Override
   public void onCreate() {
       super.onCreate();
       //Inflate the chat head layout we created
       mChatHeadView = LayoutInflater.from(this).inflate(R.layout.layout_chat_head, null);


       //Add the view to the window.
       final WindowManager.LayoutParams params = new WindowManager.LayoutParams(
               WindowManager.LayoutParams.WRAP_CONTENT,
               WindowManager.LayoutParams.WRAP_CONTENT,
               WindowManager.LayoutParams.TYPE_PHONE,
               WindowManager.LayoutParams.FLAG_NOT_FOCUSABLE,
               PixelFormat.TRANSLUCENT);

       //Specify the chat head position
//Initially view will be added to top-left corner
       params.gravity = Gravity.TOP | Gravity.LEFT;
       params.x = 0;
       params.y = 100;

       //Add the view to the window
       mWindowManager = (WindowManager) getSystemService(WINDOW_SERVICE);
       mWindowManager.addView(mChatHeadView, params);


//….
//….
   }


   @Override
   public void onDestroy() {
       super.onDestroy();
       if (mChatHeadView != null) mWindowManager.removeView(mChatHeadView);
   }
}
Để người dùng có thể kéo chat head khắp màn hình, chúng ta sẽ override OnTouchListener().
Mỗi khi người dùng chạm vào chat head, chúng ta sẽ ghi lại tọa độ (x, y ) ban đầu và khi người dùng di chuyển ngón tay, app sẽ tính toán tọa độ (x, y) mới và di chuyển.
Khi người dùng click vào biểu tượng [x] ở góc phải bên trên của chat head, chúng ta stop service để đóng chat head bubble.
Vẫn trong ChatService.java, bạn thêm đoạn code sau:
//Set the close button.
ImageView closeButton = (ImageView) mChatHeadView.findViewById(R.id.close_btn);
closeButton.setOnClickListener(new View.OnClickListener() {
    @Override
    public void onClick(View v) {
        //close the service and remove the chat head from the window
        stopSelf();
    }
});

//Drag and move chat head using user's touch action.
final ImageView chatHeadImage = (ImageView) mChatHeadView.findViewById(R.id.chat_head_profile_iv);
chatHeadImage.setOnTouchListener(new View.OnTouchListener() {
    private int lastAction;
    private int initialX;
    private int initialY;
    private float initialTouchX;
    private float initialTouchY;

    @Override
    public boolean onTouch(View v, MotionEvent event) {
        switch (event.getAction()) {
            case MotionEvent.ACTION_DOWN:

                //remember the initial position.
                initialX = params.x;
                initialY = params.y;

                //get the touch location
                initialTouchX = event.getRawX();
                initialTouchY = event.getRawY();

                lastAction = event.getAction();
                return true;
            case MotionEvent.ACTION_UP:
                //As we implemented on touch listener with ACTION_MOVE,
                //we have to check if the previous action was ACTION_DOWN
                //to identify if the user clicked the view or not.
                if (lastAction == MotionEvent.ACTION_DOWN) {
                    //Open the chat conversation click.
                    Intent intent = new Intent(ChatHeadService.this, ChatActivity.class);
                    intent.addFlags(Intent.FLAG_ACTIVITY_NEW_TASK);
                    startActivity(intent);

                    //close the service and remove the chat heads
                    stopSelf();
                }
                lastAction = event.getAction();
                return true;
            case MotionEvent.ACTION_MOVE:
                //Calculate the X and Y coordinates of the view.
                params.x = initialX + (int) (event.getRawX() - initialTouchX);
                params.y = initialY + (int) (event.getRawY() - initialTouchY);

                //Update the layout with new X & Y coordinate
                mWindowManager.updateViewLayout(mChatHeadView, params);
                lastAction = event.getAction();
                return true;
        }
        return false;
    }
});
Bước 4: Handle Overdraw permission
Bước cuối cùng, để hiện thị chat head, bạn phải khởi động ChatService.java.
Trước đó, chúng ta phải kiểm tra xem app có permission android.permission.SYSTEM_ALERT_WINDOW hay không?
Các Android có API level 22 trở về trước, permission này được bật tự động. Từ android sau API 22, chúng ta phải bật permission thủ công khi được sự cho phép của người dùng.
SYSTEM_ALERT_WINDOW là loại permission đặc biệt, bạn không thể cấp quyền ngay trong ứng dụng được. Bắt buộc phải cấp quyền trong màn hình setting của hệ thống.Để bật permission, ứng dụng cần phải mở màn hình quản lý permission để người dùng có thể thay đổi (chấp nhận hoặc không) permission qua action: Settings.ACTION_MANAGE_OVERLAY_PERMISSION.
Lệnh này sẽ mở ra màn hình như dưới đây:

Dưới đây là một phần code MainActivity để hiển thị chat head khi SYSTEM_ALERT_WINDOW permission được cho phép.
public class MainActivity extends AppCompatActivity {
    private static final int CODE_DRAW_OVER_OTHER_APP_PERMISSION = 2084;

    @Override
    protected void onCreate(Bundle savedInstanceState) {
        super.onCreate(savedInstanceState);
        setContentView(R.layout.activity_main);

        //Check if the application has draw over other apps permission or not?
        //This permission is by default available for API<23. But for API > 23
        //you have to ask for the permission in runtime.
        if (Build.VERSION.SDK_INT >= Build.VERSION_CODES.M && !Settings.canDrawOverlays(this)) {

            //If the draw over permission is not available open the settings screen
            //to grant the permission.
            Intent intent = new Intent(Settings.ACTION_MANAGE_OVERLAY_PERMISSION,
                    Uri.parse("package:" + getPackageName()));
            startActivityForResult(intent, CODE_DRAW_OVER_OTHER_APP_PERMISSION);
        } else {
            initializeView();
        }
    }

    /**
     * Set and initialize the view elements.
     */
    private void initializeView() {
        findViewById(R.id.notify_me).setOnClickListener(new View.OnClickListener() {
            @Override
            public void onClick(View view) {
                startService(new Intent(MainActivity.this, ChatHeadService.class));
                finish();
            }
        });
    }

    @Override
    protected void onActivityResult(int requestCode, int resultCode, Intent data) {
        if (requestCode == CODE_DRAW_OVER_OTHER_APP_PERMISSION) {

            //Check if the permission is granted or not.
            if (resultCode == RESULT_OK) {
                initializeView();
            } else { //Permission is not available
                Toast.makeText(this,
                        "Draw over other app permission not available. Closing the application",
                        Toast.LENGTH_SHORT).show();

                finish();
            }
        } else {
            super.onActivityResult(requestCode, resultCode, data);
        }
    }
}
❤ Bạn có thể hứng thú với một vài thông tin về Activity Android
Xong rồi. Hãy thử chạy app để kiểm tra kết quả. Dưới đây là một mẫu giao diện của app.
Lời kết
Các bạn có thể download toàn bộ source code của bài hướng dẫn này tại đây nhé:
Nếu vẫn còn băn khoăn chỗ nào thì comment bên dưới nhé! Good luck!
💦 Đọc thêm bài viết hướng dẫn học lập trình Android:
- [Android] Tạo custom Dialog với hiệu ứng Circular Reveal
- Tạo Tooltips trong Android không cần code
- Tạo tính năng mua hàng trong ứng dụng (In App Purchase)


Tạo xong rồi làm sao để khi ấn vào biểu tượng ngoài màn hình quay vào ứng dụng vậy
cho mình hỏi tại sao nó cứ bị lỗi chỗ mWindowManager.addView(mChatHeadView, params); vậy
Bạn bị lỗi gì vậy?
Chạy thì ổn, nhưng bấm vào button ở mainActivity thì lại ko hiện chat head bạn ơi
Sao lúc chạy bị lỗi nhỉ. lần đầu chạy thử android studio nên cũng không rành lắm.
Hi Lê
Bạn có thể cho mình biết cụ thể là lỗi gì không? Mình sẽ hỗ trợ bạn
WOW, thì ra tạo cái này cũng dễ nhỉ!
AD ơi. Sao down được file code về vậy ạ? Chỉ e vs. em đaq muốn tạo 1 cái chathead
Hi Tú
Mình xin lỗi vì đã response chậm nhé. Mình đã update link download rồi đấy, bạn click vào nút download code để download lại nhé .
Chúc bạn thành công trên con đường coder 🙂